Headquarters: 535 Pine Street, Central Falls, RI 02863
Call us: 401-274-0111
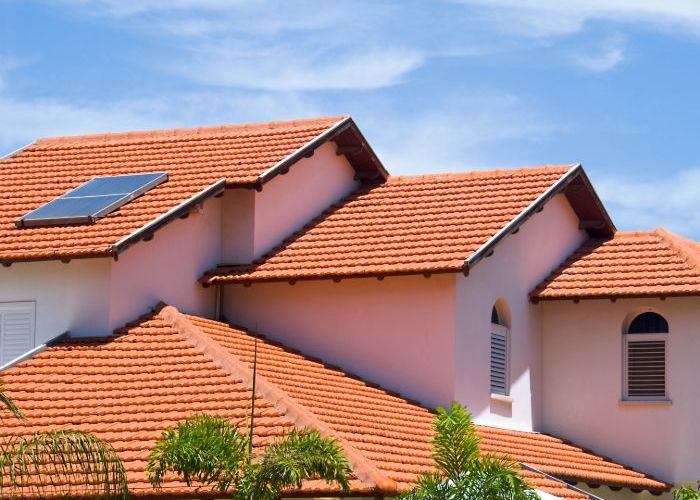
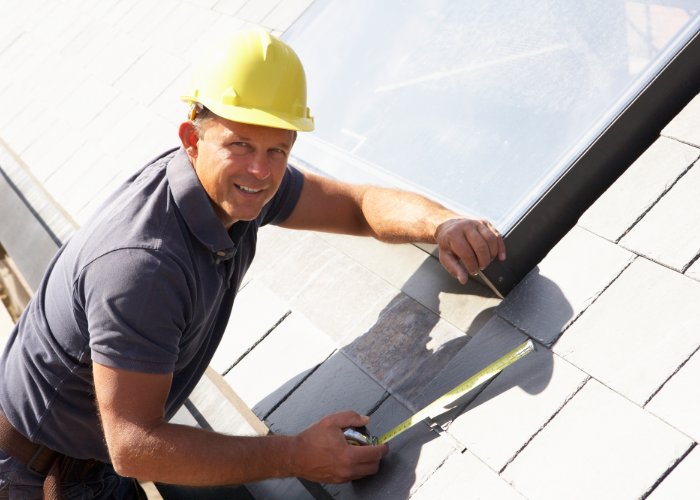
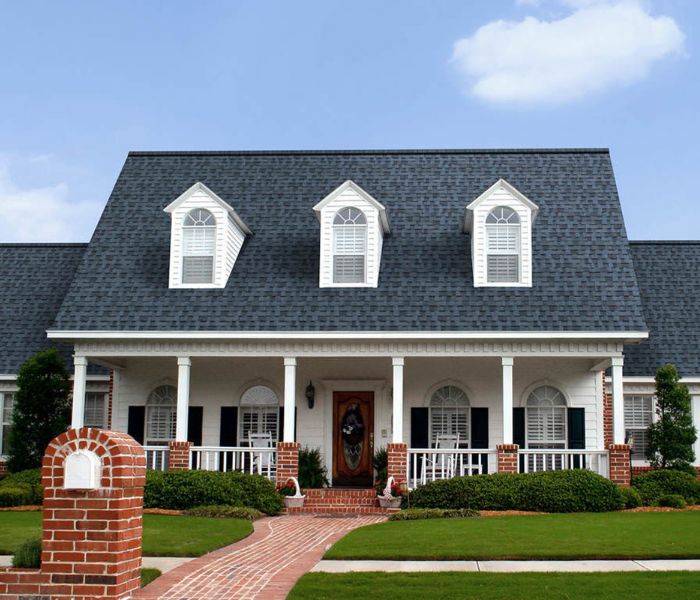
As the skies open up and it starts pouring rain outside, the last thing you want to hear is the distinct sound of drips coming from your ceiling. "Plip plop, plip plop." Uh oh, that's never a good sign.
So, how do I stop my roof leaking in heavy rain? Inspect your roof to find and seal leaks using caulk or cement patches for minor cracks and holes, or call a professional roofer for major repairs. Prevent future leaks by regularly clearing debris from your roof and gutters and addressing minor issues before major damage occurs.
Before you panic and start envisioning your living room turning into an indoor swimming pool, take a deep breath. A leaky roof in heavy rain is annoying, but it's usually fixable with some strategic troubleshooting and maybe a professional roof estimate.
Your first order of business is to mitigate any damage. Skip the towels - place buckets and containers under drips to catch water. No one wants soaked sheets or a flooded floor. Protect valuables like electronics, too. Once you've contained the situation, it's time to put on your waterproof boots, grab a sturdy ladder, and get sleuthing.
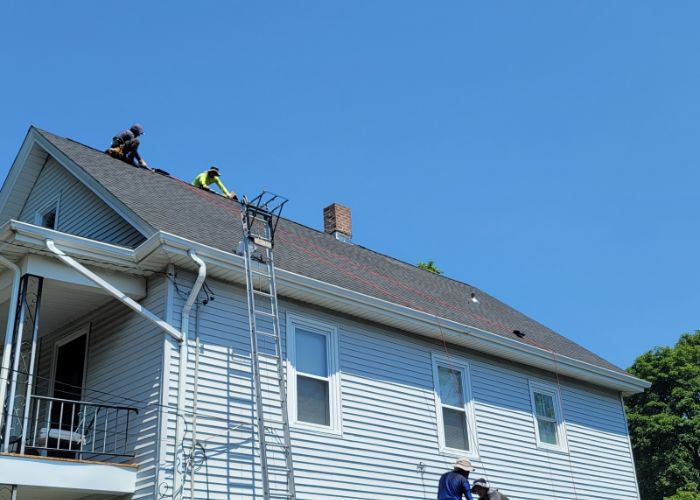
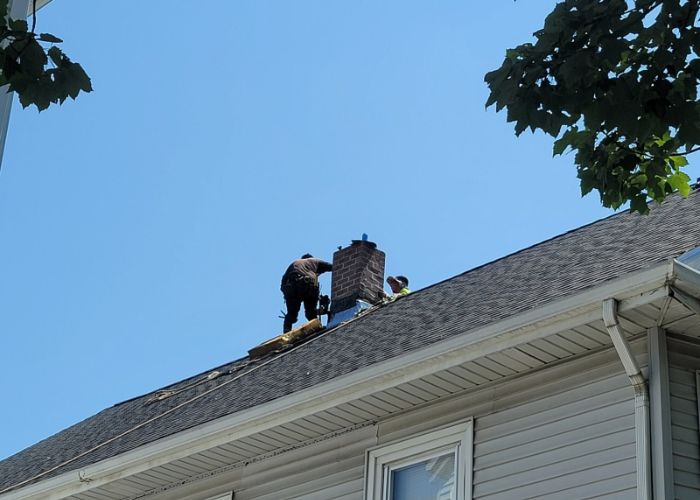
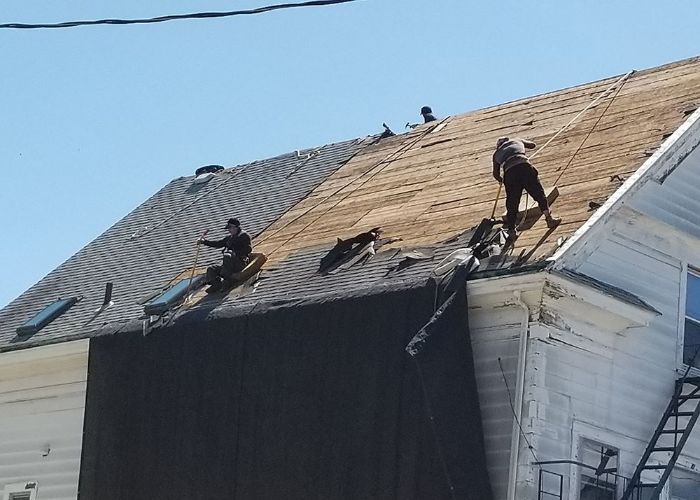
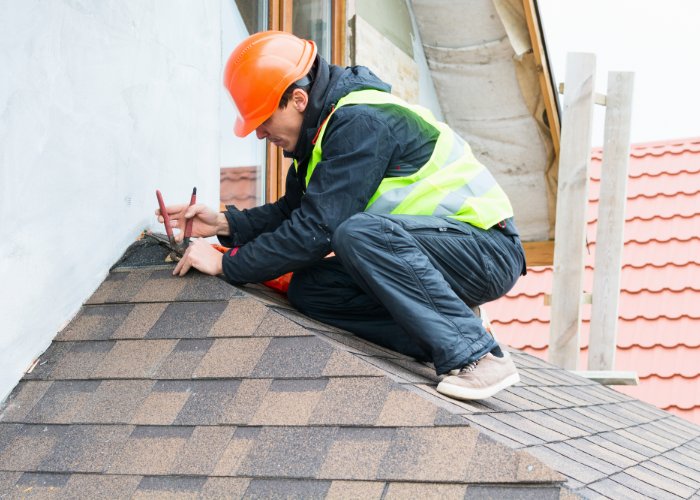
Carefully climb up onto your roof to inspect the trouble spots. Search for missing, cracked, or loose roof tiles, peeled seams around skylights or vents, deteriorated sealant, and gaps around any roof penetrations. Flashing around chimneys and vent pipes is also suspect. Zoom in with your trusty binoculars if needed. Ahh, I see, there's the culprit!
Now that you've zeroed in on the leaks take quick action. For minor cracks or holes in roofing material, apply sealant as a fast fix until proper repairs can be made. For exposed nail heads allowing water intrusion, simply hammer another nail nearby and cover with sealant.
Reattach any loose shingles or patch holes with roofing cement and similar material to keep the inside dry. Secure flashing around roof edges and protrusions. Fill gaps with urethane caulk or other flexible waterproof sealant. Just like that, your impromptu repairs will help stem the watery invasion.
While duct tape might work great on leaky pipes, it's not a long-term solution for roof damage. If you see curled, missing, or broken shingles in multiple areas, it's best to leave major fixes to the professionals. Continuing to patch problems may seem cheaper but typically ends up costing more in the long run once structural issues arise.
A reputable roofer has the skills, proper equipment, and materials to diagnose problems and remedy them for good. They can accurately assess and measure your entire roof, advise on the best permanent solutions based on your home, climate, and budget, and guarantee their quality craftsmanship.
An ounce of prevention is worth a pound of cure when it comes to roof leaks. Make seasonal inspections part of your home maintenance routine. Trim back encroaching tree branches. Clear out gutters and downspouts regularly to facilitate drainage. Address minor issues before they worsen into major headaches down the road (and into your living room).
Monitor attics and ceilings after heavy storms, too. At the first sign of water spots, investigate ASAP. Catching any damage early allows for simpler repairs. With a little diligent care and TLC, you can stop roof leaks before they start raining on your parade. Now, where did I leave my umbrella? This little duck better waddle inside before I end up soaked, too!

A leaky roof can quickly dampen your mood, but don't let the drips get you down for long. With some quick investigative work and the right fixes, you can tackle those pesky leaks at the source and stop the flow before it causes a flood. Stay attentive to your roof's status, get proactive at the first signs of trouble, and schedule preventive upkeep to keep menacing rain clouds at bay. Maintaining your roof can take a little effort, but the payoff of keeping your indoor space watertight is well worth it. With the right knowledge and preparations, you can send those leaky roof blues away for good!
About United Better Homes
At United Better Homes, we have over 20 years of experience fixing leaky roofs in your area. Our licensed professionals can diagnose any roof problem and recommend the best solution, whether you need a quick patch job or full roof replacement. If you're dealing with a roof leak from heavy rains, don't waste any more time - call United Better Homes today at 401-274-0111 for prompt, reliable service.
What to do if ceiling is leaking from rain?
If you notice water spots or drips coming from your ceiling during heavy rain, place buckets underneath to catch the water and mitigate any damage. Then, once the rain stops, get up on your roof or ladder to inspect the exterior and look for missing, cracked, loose, or bent shingles. Inspect the flashing and sealants around vents or skylights, and repair any damage immediately before further leaking can occur.
What is the best solution for roof leakage?
The best solution is to have a professional roofer inspect your entire roof and diagnose the specific areas leaking and the primary causes, whether it's cracked shingles, deteriorated sealants, poor drainage from gutters, flashing issues, or structural damage. The roofer can then recommend and provide the proper repairs based on your roof type and extent of damage, such as applying waterproof cement patches, resealing seams, replacing individual or bundles of shingles, or more major fixes to ensure no further leaking or water damage occurs.
What makes a roof watertight?
A watertight roof starts with quality shingles or roofing materials that resist cracking and bending, allowing water to run off the surface seamlessly. Proper layering of waterproof membranes and adequate sealing and cement between shingles, flashing, vents, and edges keep water from seeping through. Clear gutters and downspouts provide drainage without overflow and moisture buildup. Regular maintenance checks and cleaning, as well as addressing minor cracks early, prevent expansion of problem areas and ensure leaks are promptly fixed.
A sagging roof is no laughing matter (unless you have a strange sense of humor). But it is pretty common. If you look up at your roofline and see it dipping in places, you likely have a sagging roof situation on your hands.
What causes a sagging roof? A sagging roof is commonly caused by deterioration of the roof materials due to old age, as well as structural issues like inadequate support, water damage, improper installation, excessive weight, or poor ventilation. These problems lead to loss of structural integrity, causing the roof to dip and droop under its weight.
They say nothing lasts forever, and the same goes for your roof. As your roof system ages, the materials naturally start to deteriorate. The shingles become brittle and cracked. The sheathing and rafters weaken. The nails loosen up. Gradually, the roof loses its structural integrity and starts to sag under its own weight. Sometimes, roof replacement is necessary.
Old roofs aren't as spry as they used to be. They just can't hold themselves up like they could in their prime. If your roof is drooping in its advanced age, it may be time for replacement.
If you live in an area that receives heavy snowfall during the winter, the accumulated weight of snow and ice on your roof can cause it to sag over time. A fresh blanket of fluffy snow may look pretty and harmless. But as it compacts and turns to ice, it becomes dense and extremely heavy. This concentrated weight exerts a tremendous downward pressure on your roof.
A roof that is already worn or structurally weak will have trouble shouldering this seasonal burden. The decking compresses, and the rafters bow, leaving you with a sagging roofline come springtime.
Upgrading to a high-quality roofing material better equipped to handle snow loads can help avoid this issue.
Your roof needs a solid framework to keep its shape. But over time, as construction errors or flaws become apparent, that critical support system can fail. Issues like inadequate rafter sizing, spaced rafters, or broken roof trusses can rob your roof of the internal strength it needs to maintain that crisp horizontal line.
Inadequate attic ventilation also accelerates the breakdown of roof sheathing and rafters by trapping excess heat and moisture. Prevent sagging by ensuring your roof has robust underlying support and proper airflow right from the start.
Water is the roof’s natural enemy. When water repeatedly seeps into your roof from rain or snowmelt, it can cause mold, mildew, and eventually rot within the roof deck and rafters. This moisture-related decomposition eats away at the wood, weakening critical load-bearing components.
Plus, a saturated roof becomes much heavier, placing additional strain on the supporting structure. Water also expands as it freezes, exerting outward pressure. This one-two punch of excess weight and expanding ice crystals can quickly lead to ugly roof sagging.
Even brand-new roofs can start sagging, often due to installation errors. Using the wrong fasteners, nailing in a shoddy pattern, or failing to join roof segments adequately are common mistakes that undermine the structural integrity of the roof right off the bat.
Using green or warped lumber is another concern, as is layering the roofing material improperly. Starting on the wrong foot with poor workmanship sets the stage for problems like sagging down the road. Thoroughly vet your roofing contractor to avoid these rookie mistakes.
Your roof is quite versatile, but it's not indestructible. Excessively heavy loads can cause it to bend and sag. Using heavy equipment like lifts or cranes on the roof places highly concentrated weight in small areas. Storing excessively heavy equipment or building materials like tiles or stone in the attic can also weigh down the ceiling joists.
Inspect your attic and ask about equipment use before starting any roof project to ensure you don't tax your roof beyond its limits. Distribute weight as evenly as possible, reinforce the structure if needed, and avoid overloading small sections.
Trapped hot air and moisture in the attic will also contribute to sagging over time. Proper roof ventilation allows air to move freely in and out, keeping the roof decking and framing cooler and drier. Without ample airflow, heat and condensation buildup will accelerate the deterioration of the roof.
Missing, blocked, or insufficient vents starve the roof of the fresh air circulation it needs. Heat and humidity get trapped in the attic, wearing away at the structure and materials. Ensure your roof is adequately vented to allow moisture to escape and prevent premature sagging.
A droopy, sagging roofline is usually indicative of an underlying problem, whether it's old age, structural issues, weather damage, or improper construction. While it may start slowly and subtly, a sagging roof will eventually require repairs to prevent full failure. Catch this issue early and address the root cause to restore your roof to its proper form and function. With the right maintenance and care, you can keep your roof looking perky and prevent it from going south.
About United Better Homes
United Better Homes is your local, trusted contractor for all roofing, siding, and window installation and repairs. With over 20 years of experience, our experts can diagnose issues like sagging roofs and recommend the best solutions while providing quality workmanship you can rely on. Contact the team today at 401-274-0111 for your free inspection and estimate.
Can a sagging roof be fixed?
In many cases, a sagging roof can be repaired if the damage is not too extensive and the underlying cause is properly addressed. However, if the sagging is severe due to old age or structural failure, it may be more cost-effective to replace the roof rather than attempting extensive repairs completely.
How serious is a sagging roof?
A sagging roof is a serious issue that should not be ignored, as it indicates potential structural problems and ongoing damage to the roof system. If left unaddressed, a sagging roof will continue to deteriorate, leading to leaking, mold growth, and eventual roof failure that requires expensive replacement.
What to do when roof is sagging?
If you notice your roof sagging, take action as soon as possible to prevent further damage. Start by having a professional roofer inspect the roof and determine the cause, such as deterioration or structural issues. For minor sagging, repairs like reinforcing rafters or installing additional vents may fix the issue. However, for severe sagging or signs of extensive water damage, a full roof replacement may be required to address the underlying problems causing the sag. Don't delay - tackling a sagging roof now can prevent much larger headaches down the road.
Why does my roof have a dip in it?
There are several potential causes for a dip or sag in your roof. The roof decking or framing may be deteriorating from age, causing a loss of structural support. Insufficient attic ventilation and moisture can damage the roof sheathing. Excess weight from heavy snow, equipment, or materials can also cause dips and sags. Water damage from leaks can rot the roof deck and rafters. Improper installation with inadequate fastening or support may be to blame as well. Dips and sags indicate your roof needs repairs to address the underlying cause, whether it's age, water damage, weight issues, attic moisture, or installation problems. Don't ignore a sagging roofline, as further deterioration and more serious failure could occur.
Can a sagging roof collapse?
A sagging roof is at high risk for eventual collapse if the underlying structural issues are not properly addressed. As the roof decking and rafters deteriorate from age, water damage, or other problems, they become unable to bear the weight load. Sagging progresses to serious deformation and compromised structural integrity. Additional strain from snow, equipment, or moisture buildup can be the last straw that leads to catastrophic failure. Warning signs like severe sagging, cracks, leaks, and visible rot mean collapse could be imminent if repairs are not urgently made. If you notice extreme roof sagging, have it evaluated right away before the damage escalates and causes the roof to cave in fully.
How do you reinforce a sagging roof?
To reinforce a sagging roof, start by identifying and repairing leaks to prevent further water damage. Next, inspect the roof structure and replace any rotten or damaged boards and rafters as needed. Structural supports like sistering rafters, adding collar ties, or installing roof jacks can help shore up sagging areas. Finally, removing excess weight stored in the attic and improving ventilation will also take strain off the roof. These targeted reinforcements and repairs can restore integrity and stop a roof from sagging further.

Fascia board, sometimes called fasciation or fascia, is an important architectural feature of many homes.
So, what is the purpose of fascia board? It serves several key purposes relating to the structure and appearance of a home. The main purpose of the fascia board is to provide a decorative, finished edge to a roofline while also functionally stabilizing rafter ends, anchoring gutters, and enclosing the eaves.
In this article, we will explore what fascia board is and its main functions.
Fascia board refers to a trim board that runs horizontally along the edge of a roof type and material. It caps the ends of roof rafters and often overhangs the exterior walls of a house. Fascia is typically made of wood, metal, or composite materials.
The main role of a fascia board is to stabilize the rafter ends and anchor the gutters while also providing a decorative covering. Fascia also gives the roofline a finished look. Without it, the look of a roofline would be unfinished with exposed rafter tails.
One of the main reasons fascia board is used is for aesthetic purposes. It gives the roofline a clean, finished look. The fascia helps conceal the look of rough rafter ends and allows the roofline to be painted or stained to match the color scheme of the home.
Fascia boards can be simple 1x4 or 1x6 wood boards. Or it can be more elaborate with added trim and molding details. The fascia is often the only decorative feature on the exterior of a roof. So, the style and details of the fascia board can dramatically impact the curb appeal of a home.
Another key function of fascia boards is to provide an anchoring point for gutters. The bottom edge of roof gutters attaches securely to the fascia board. This allows the gutters to collect rainwater runoff from the roof and channel it safely away from the home’s foundation.
Without fascia board, gutters would have no solid mounting surface. Gutters need to attach very securely to prevent sagging, leaking, and detachment. Fascia provides an ideal long, sturdy mounting surface for the entire perimeter of the roofline.
On many homes, the fascia board serves as the finished exterior edge of the roof sheathing or decking. Shingles are only installed up to the fascia board. The fascia covers the exposed edge of the sheathing material.
This provides a couple benefits. First, it encloses and protects the edge of the roof sheathing from water damage. It also gives the roof edge a clean, finished appearance. The shadow line of the fascia board delineates the roofing material from the rest of the home’s exterior.
Fascia board helps stabilize and strengthen the ends of rafters where they overhang the walls. The rafter ends intersect the fascia board, which ties them together structurally. The fascia helps prevent rafters from twisting or spreading, which could compromise the roof structure.
On homes with roof overhangs, the rafter ends beyond the walls are cantilevered and need additional support. Properly installed fascia board provides stabilization for the rafter tails. It also allows the rafter ends to be securely fastened.
For homes with open eaves, fascia board is one side of an enclosure that finishes the look of the eave while allowing ventilation. The fascia board runs horizontally, while vertical trim boards close off the eave ends.
This creates a soffit - an enclosed channel that allows airflow to ventilate the underside of the roof. The fascia and soffit framework provide a clean finish to what would otherwise be an open, unfinished roof overhang.
In addition to gutters, fascia board provides an attachment surface for soffits. Soffits are horizontal panels installed underneath roof overhangs. Like gutters, soffits need a solid mounting surface. The fascia board provides a sturdy linear surface for attaching the soffit panels.
On many homes, soffits are an integrated system with the fascia board. The fascia and soffits combine to enclose the eaves and provide ventilation. Many prefabricated soffit panels are designed to interlock with corresponding fascia boards.

Properly installed fascia board provides many benefits:
Conversely, fascia that is poorly installed or maintained can detract from the home's aesthetics and lead to structural issues.
In summary, fascia board serves a variety of important roles related to both form and function. Aesthetically, it gives a house a more attractive, complete look. Structurally, it stabilizes rafters, anchors gutters, and protects roof sheathing. It also allows for ventilation in the eaves. While largely decorative, fascia board is an integral architectural feature for enhancing the design and durability of a house.
About United Better Homes
United Better Homes is your premier contractor for roofing, solar panels, windows, and siding in Rhode Island. With over 20 years of experience, their qualified team of installers provides top-quality exterior home improvement services designed to enhance your home's comfort, efficiency, and curb appeal. For reliable home improvements and repairs, trust the knowledgeable professionals at United Better Homes by calling 401-274-0111 today.
What goes over fascia board?
The main items that go over fascia board are gutters and soffits. Fascia board provides an ideal mounting surface for securely attaching gutters along a roof's edge to collect rainwater drainage, as well as soffit panels under the eaves to enclose and ventilate the roof overhang.
How do I know if my fascia board is bad?
Signs that your fascia board needs repair or replacement include rotting or deteriorating wood, peeling paint, warped or buckled boards, loose areas, and water damage. You may also suspect fascia problems if you notice sagging gutters, leaking areas on the roof edge, or gaps that allow pests into the eaves.
Can you live without fascia?
While it is possible to live without fascia board, it is not recommended for most homes. Removing fascia board would leave the rafter tails and roof edge exposed, giving the roofline an unfinished, unprotected look. The lack of fascia would also mean gutters would have no solid mounting surface, so they could not be properly installed. Finally, the absence of fascia board would allow the rafter ends and roof sheathing to be more vulnerable to damage. In most cases, fascia serves important functional and aesthetic roles, so it is better to have it than to omit it entirely.
How important is fascia on a house?
Fascia is a very important architectural feature for several reasons. Fascia gives the roofline a clean, finished look and enhances the home's curb appeal. It also serves the critical function of stabilizing rafter ends to strengthen the roof structure. Additionally, fascia provides an essential mounting surface for anchoring gutters and channeling water away from the home. Finally, proper fascia installation protects the edge of the roof sheathing and allows for ventilation to prevent moisture issues. In summary, fascia is much more than decoration - it plays integral roles in the performance and durability of the roof system.
When do roofs need to be replaced for residential homes? This is probably one of the most common questions asked by homeowners! However, there is no “one size fits all” answer, as it depends on the roofing material, your climate, and maintenance. Also, some manufacturers offer higher-quality materials than others, so they last longer than their competitors.
When do roofs need to be replaced, on average:
Again, these are just averages, and your roof’s lifespan will vary. To ensure you’re keeping your home in good repair, consider some warning signs of needed roof replacement. Also, a roof repair contractor near you can inspect your roof and note its age and condition. In turn, they can advise on the best choice for your property.
Whether your roof needs replacing depends on its age and condition and the climate in your area. Note some general guidelines to help you determine when a roof may need replacement, in greater detail:
The very first factor to consider is the age of your current roof along with the manufacturer's warranty period. Most roofing materials like asphalt shingles come with a warranty that covers defects for a certain number of years, usually around 20-25 years.
Take note of when your roof was installed and the exact warranty coverage you received. If the roof is nearing or has surpassed the end of the warranty period, its lifespan is likely coming to an end as well. Materials like shingles lose resilience and weather-resistance as the years go by.
The lifespan can also vary depending on the quality of the shingles. Budget shingles may only last 15-20 years, while premium shingles boast lifespans of 30 years or more. The manufacturer usually notes the expected longevity to help guide when replacement is needed.
Additionally, local climate plays a major role. Roofs in areas with harsh weather extremes like hail, high winds, and dramatic shifts in temperature tend to deteriorate faster. The intense sunlight in hot climates can also wear down roofing materials quicker.
If you live in an area prone to weather extremes, your roof will likely need replacing sooner than its stated warranty period. Regular inspections are especially crucial to determine if age plus environmental factors mean it's time for a new roof.
Don't rely solely on the warranty date. Carefully consider the roof's age, conditions it has endured, and overall signs of wear and tear. This gives a fuller picture of when your roof realistically needs replacement.
Inspect your roof regularly for signs of damage, such as missing or damaged shingles, cracked or curling shingles, and granule loss. These issues can compromise the roof's ability to protect your home from the elements. They also indicate that repairs are not enough, and the roof probably needs full replacement.
If you notice water leaks or stains on your ceiling or walls, it's a clear sign that your roof is not doing its job properly. Roof leaks should be addressed promptly, as they can lead to more extensive damage if left untreated. Extensive leaks can indicate that the roof needs complete replacement.
In humid or moist climates, roofs can develop moss, algae, or lichen growth. While these organisms themselves may not necessarily damage the roof, they can trap moisture and accelerate shingle deterioration. Cleaning the roof may be necessary, and if the damage is severe, replacement may be recommended.
Roof decking refers to the plywood beneath the upper roof materials. The decking holds those materials and their underlayment in place. If you notice sagging or signs of decking rot, it may be necessary to replace the entire roof.
Severe weather events, such as hailstorms or hurricanes, can cause significant damage to a roof. Even if the damage isn't immediately apparent, it's a good idea to have your roof inspected after such events. A professional can ensure there are no hidden issues or note if the roof needs replacing.
Also, consider that storms are especially damaging to older roofs or those already suffering wear and tear. Hail can easily dent old, brittle shingles and other materials. High winds can tear worn shingles and tiles of damaged roofs more readily. In turn, have the roof inspected, especially if it’s older or not in good condition.
Older roofs may not have proper insulation or ventilation, leading to higher energy bills. Upgrading to a more energy-efficient roofing system can improve your home's energy efficiency and reduce utility costs. Additionally, leaks and other damage can mean poor energy efficiency. Consequently, consider a roof inspection if you notice your energy costs spiking.
There are also "cool roofs." A cool roof refers to a roofing system designed to reflect more sunlight and absorb less heat than a standard roof. The main features of a cool roof include:
If you find yourself frequently needing repairs in various areas of your roof, it's a likely sign that full replacement is required. Needing regular roof repairs can indicate the roof is nearing the end of its lifespan.
Certain issues like damaged or curling shingles, minor leaks, and flashing repairs may seem manageable at first. But if these problems keep recurring in different sections year after year, it points to generalized deterioration.
The roof is likely worn out as a whole, not just in isolated areas. In this case, repairs can no longer provide a long-term fix. The problems will simply continue popping up across the roof surface.
While all these signs listed above indicate that it’s time for a roof inspection, not all are as serious as the rest. For example, you might have chosen a less energy-efficient roof at your last installation to save on those costs. In turn, higher heating and cooling bills aren’t necessarily an urgent sign of needed roof replacement.
Also, moss and algae growth are common in tropical areas, as said. However, if you invest in proper power washing and remove these growths quickly, they might not risk severe damage. Consider an annual inspection to note the roof’s condition, but don’t assume that moss and algae themselves mean it’s time for a replacement.
On the other hand, issues like leaks and missing tiles or shingles need immediate attention. Roof leaks let moisture seep into the decking area. This increases the risk of rot and other damage, which means eventual deck replacement.
Moreover, missing tiles or shingles also expose the roof’s underlayment and decking to water and other elements. This increases the risk of severe damage and the need for roof replacement. As such, it’s good to address these issues promptly to avoid otherwise unnecessary replacement.
A 20-year-old roof can be nearing the end of its expected lifespan, depending on the roofing material and climate. Note a bit more information about common roofing materials:
It's important to remember that these are general guidelines. If your 20-year-old roof is not showing signs of wear or damage, it may have several more years of life. However, it's a good idea to have it inspected by a professional roofing contractor. Regular inspections can help you get the most out of your roof's lifespan.
The durability of roofing materials varies widely. However, several roofing materials are known for their longevity and longer lifespans:
United Better Homes is happy to answer the question, when do roofs need to be replaced. You can also call our Rhode Island roof repair contractors if you’re ready for a FREE inspection and price quote. We look forward to hearing from you!
The roofs over our heads often blend into the background, but they have a rich history here in the Ocean State.
So, what is the history of roofing styles in Rhode Island? The state's colonial past, available local resources, and technological advancements over time have all influenced the development of distinct regional roofing styles. From the steeply pitched gables of weathered gray shingles to the clean lines of modern standing seam metal, the roofs of Rhode Island tell a fascinating story.
Join me on a quick tour of the iconic roof types that have sheltered Rhode Islanders through the years, spotlighting a few of the inventive materials and designs used to contend with our state's wet, gusty climate.
Rhode Island's architectural heritage stems from two continents. The first colonists brought building knowledge from England and other parts of Europe. But as the new nation developed its own identity, American innovations also shaped Rhode Island's roofscapes.
European styles prevailed in the 1700s as wealthy Rhode Island merchants built substantial homes. Medieval thatched roofs fell out of favor as many adopted Georgian and Federal style trends popular in England. These homes reflected order and refinement with their symmetrical façades and classical details. Stacked brick chimneys punctuated meticulously framed gable or hipped roofs. Elite homeowners could afford slate shingles imported from Europe or the mid-Atlantic colonies.
By the mid-1800s, the Second Empire and Victorian Gothic styles arising in America offered fresh inspiration. The Second Empire was modeled after French design with signature mansard roofs and ornamental brackets under the eaves. Pointed arches and steep cross-gables distinguished Gothic Revival homes, often constructed with decorative vergeboard trim.
These new architectural flavors moved beyond older European classicism. Yet slate and wood shingles remained go-to roofing materials, now shaped into bold new American forms. Even as European influence waned, settlers clung to the familiar protective roofing elements of their ancestors.
Rhode Island roof design tells a nuanced story, weaving together diverse Old World and New World perspectives. As architectural tastes shifted, the small state’s roofs provided a canvas for creative reinterpretation.
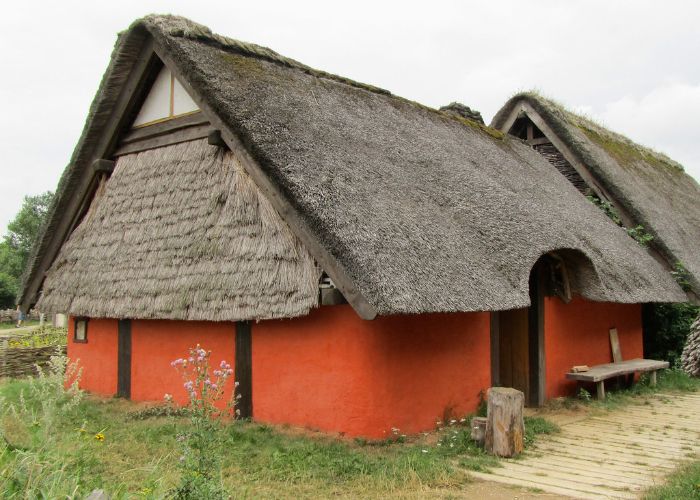
Back in the 1600s and 1700s, the earliest Rhode Island settlers used what materials they had on hand to build their homes, and that included using tall grass, reeds, and straw for thatched roofing. These roofs provided basic shelter but left a lot to be desired. Rain and snow leaked through pretty easily, and fire was a constant threat with all that dry straw overhead. Still, you have to appreciate the DIY spirit of those early colonists.
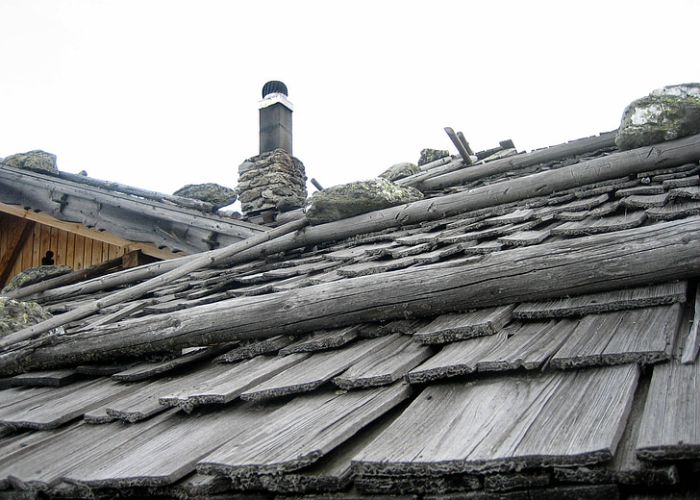
As sawmills popped up in the late 1700s, wooden shingles became popular for roofing. The dense forests of Rhode Island provided plenty of material for these roofs made from oak, cedar, and cypress shingles. Wood lasted longer than thatch but was prone to rotting and warping. Homeowners could get fancy with decorative patterns or fish scale shingles. Over time, the weathered gray look of worn wood shingles became a classic symbol of New England architecture.
In the mid-1800s, slate roofing tiles from Vermont and Pennsylvania became prized for their durability and fireproofing. Homes with slate roofs carried a certain prestige. Installing these heavy tiles was no easy task, so you knew someone was doing well if they had slate on top. The expense meant slate was mostly found on churches, universities, and homes of the wealthy. Unique decorative patterns and colors like deep red or purple slate made for striking rooflines.
Asphalt shingles really took off in the post-World War II suburban building boom. As families flocked to newly developed neighborhoods, contractors relied on this economical roofing material to quickly build rows of homes. Early 20th-century asphalt shingles mimicked wood or slate, but by the 1950s, they morphed into a simple rectangular three-tab style.
These ubiquitous shingles emphasized affordability and ease of installation over aesthetics. Some homeowner associations banned more ornate roofing to ensure conformity. While some may see them as boring, the minimalism of mid-century asphalt shingles reflected the sleek modernism of the era.
Later manufacturing innovations brought more durable laminated architectural and luxury shingles. Weathered wood, slate, and shake looks remain popular. Three-dimensional texture adds depth, while colored mineral granules provide a boost of curb appeal. Homeowners can now achieve visual interest once reserved for more costly authentic materials. Modern asphalt shingles may lack the romance of hand-split wood shakes. Still, they bring resilience and variety to Rhode Island’s roofscapes.
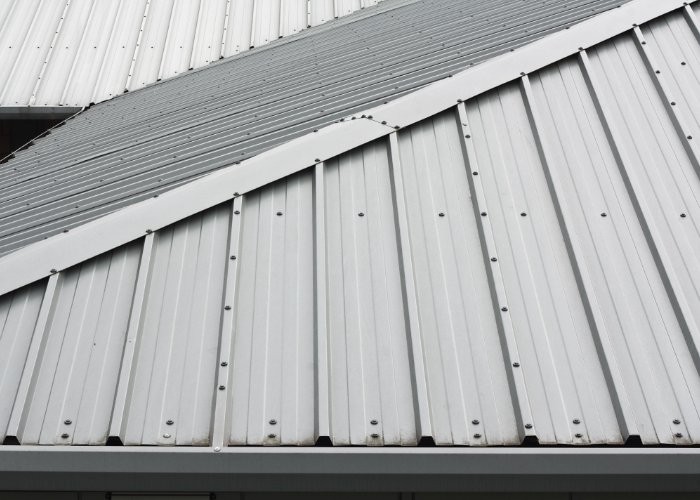
Today more homes are sporting metal roofs, a modern take on the colonial wood shingle look. Metal roofing comes in materials like steel, aluminum, copper, or tin formed to mimic shingles, tiles, or panels. Top advantages are durability and energy efficiency. Metal reflects sun to keep homes cooler and stands up to wind, rain, fire, and those falling branches in storms. Though costlier upfront, metal roofs can last 50 years or more. So the old meets the new as metal brings back that early American colonial vibe.
From humble thatched beginnings to sleek modern metal, Rhode Island roofing has come a long way. What material tops your home? Whatever its style, may your roof keep you warm, dry, and safe for many years to come!
About United Better Homes
United Better Homes offer excellent options for just about any budget. From solar services to brand-new windows, our customers depend on us to outfit their homes with the best. We're fully licensed, insured, and GAF Master Elite Roofers. To schedule an appointment, please call 401-274-0111.
Why were coopper roofs commonly seen in the 18th and 19th centuries?
Copper roofs were a status symbol in the 18th and 19th centuries due to copper's expensive cost and its durability. The use of copper roofing demonstrated a homeowner's wealth and refined taste during the colonial era and into the early days of American independence.
Were clay tile roofs used in the late 19th and early 20th centuries?
Clay tile roofs were not commonly used in Rhode Island during the late 1800s or early 1900s. The state's humid climate and freezing winter temperatures made these roofs prone to damage. They limited their adoption compared to more durable slate or wood shingles.

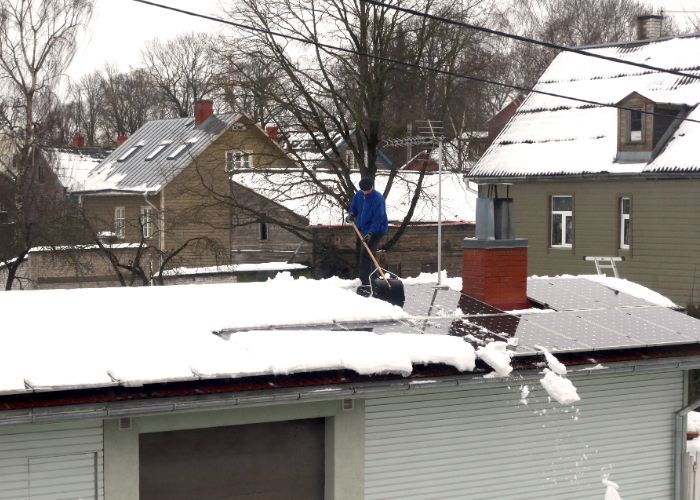
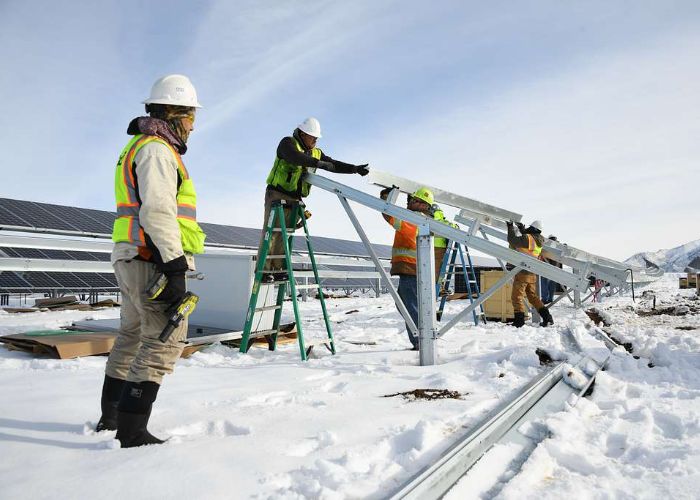
For those living in snowy climates, solar panels can be a great way to harness the power of the sun. However, snow buildup on solar panels can significantly reduce their efficiency at generating electricity. Luckily, there are several effective methods for preventing and removing snow from solar panels.
So, how to keep snow off solar panels? In brief, you can brush light snow off panels frequently to prevent dense buildup. Use scrapers or squeegees to gently clear compacted snow. Consider tilted or adjustable mounts to allow snow to slide off smoothly. Install heating systems to automatically melt snow for high maintenance-free operation.
In this handy guide, we'll explore the best practices for keeping your solar panels clear throughout the winter season. So grab your snow shovel, crank up the holiday tunes, and let's shed some "light" on maximizing solar panel performance amidst Old Man Winter's icy grip!
Optimizing the angle or tilt of your solar panels can make a big difference when it comes to shedding snow. Solar panels are typically mounted at an angle facing south to maximize sun exposure. However, in cold climates, consider tilting panels at a steeper 45-60 degree angle to encourage snow to naturally slide off the surface. The slick backing of solar panels makes snow easily glide off at sharper inclines.
Just take care when tilting panels not to cast shadows on other panels and decrease overall efficiency. Finding the sweet spot angle for maximum sunlight and minimum snow pileup may take some trial and error. But with climate change bringing less predictable winter weather, having the ability to adjust panel angles can be a useful adaptation.
Special solar panel coatings can also help repel snow buildup. Hydrophobic spray-on treatments use nano-chemicals to create a water-resistant barrier that prevents snow and ice adhesion. A little spritz goes a long way to giving panels the slick and slippery properties needed to keep snow from sticking. Anti-stick snow sprays offer a similar effect. Some even contain glycol compounds to melt snow on contact!
When applying these hydrophobic or anti-stick coatings, be sure to cover the entire surface of each panel. Focus on spraying panel edges and frames where snow accumulation often starts. Reapply coatings 2-3 times per winter season for best effectiveness. It's also a good idea to use rubber gloves and goggles when spraying panels overhead. Chemical runoff could irritate eyes and skin.
Just be sure to use coatings specifically designed for solar panels, as some chemicals can damage the surface. Reading product instructions carefully and spot testing on a small area first is recommended. A little preventative treatment before winter arrives can save hours of brushing and scraping later on. Keeping solar panels slick and snow-resistant with specialty sprays gives you more time to cozy up with some hot cocoa while the panels work freeze-free!
When an overnight dusting or daytime snow shower hits, don't let snow pile up. Light powdery snow can be quickly swept off using a soft brush or roof rake with an extendable handle. Think of it like brushing fresh powder off your car without the freezing, wet mess. Gently brush back and forth across panels to clear off snow before it densifies. This prevents heavy, compacted snow from adhering and freezing into ice. Set reminders to routinely clear after snowfalls so it doesn't accumulate. Removing a few inches at a time prevents damage and starts the snow melt process.
Following a huge dump or series of snow squalls, solar panels may get completely buried. Once snow densifies and adheres to the glass, simply brushing may not do the trick. When dealing with heavy-packed snow or ice, start by using a plastic snow scraper or squeegee to gently break up and clear off the worst buildup. Rubber-edged scrapers are ideal, as they won't scratch the glass.
You can also carefully use a broom or mop handle to poke and prod at snow chunks. But avoid using aggressive force, as too much pressure could crack solar cells. Let gravity lend a hand by tilting panels to dump off cleared snow. For ice, a deicing spray or gently applied heat from a hair dryer can help melt adhesion. With a little elbow grease, you'll have your panels glistening!
For frequent heavy snow, panel heating systems provide automated snow melting. Heated solar panel kits use embedded heating elements, much like the cables that heat driveway and sidewalk surfaces. Low-voltage electricity activates the heaters, which run along the backside frame and piping of solar panels. This melts away snow accumulation, allowing it to harmlessly drip off.
Heaters can be thermostatically controlled using sensors to activate only when needed. Kits are also available that harness excess solar electricity to run the heating system. This means solar panels can power their own snow-clearing process! Heating solar panels does divert some energy, but the boost in winter production outweighs the costs.
Not comfortable scrambling on icy rooftops or using power tools to detach frozen snow on tall panels? Know your limits, and don't risk injury! Many solar companies offer maintenance packages that cover periodic winter servicing. Trained technicians have the proper ropes, safety gear, and high-power tools to safely reach and clear all panels.
They can also spot-check for any winter weather damage that may need repairs come spring. Though adding maintenance service costs to your solar budget, the convenience and peace of mind may be worth the price. An expert cleaning leaves panels spotless and primed to offset those higher heating bills racked up from all of Jack Frost's frigid visits!
Snow can significantly hamper the efficiency and energy output of solar panels. As snow accumulates on the panels, it blocks sunlight from reaching the photovoltaic cells. This reduces the amount of solar radiation that gets converted into usable electricity. Even a light dusting of snow can decrease energy production by 30% or more. As snow depth increases, so does energy loss. At around 2-3 inches of snow, solar panel output can drop by up to 70-80%. Anything over 3 inches can essentially cut power generation to zero.
The snow's density also affects efficiency loss. Light, fluffy snow is less impactful than heavier, wetter snow that compact and adheres to the panels. Large snow drifts are especially problematic, completely burying panels under piles of snow. Until the snow is cleared, frozen-over panels are rendered entirely nonfunctional. This can mean days or weeks of greatly reduced solar energy capture during peak winter weather. For homeowners relying on solar power as their primary energy source, this can cause major problems and unexpected utility costs. Even grid-tied systems that supplement the main power supply can see electricity bills spike due to snow-disabled solar panels.
The financial hit from snow-related solar shortfalls is significant. One analysis estimated over $1 billion in revenue loss annually for the U.S. solar industry because of snow. For northern states that average 60-70 days of snowfall per year, the impact on solar capabilities and energy savings can be substantial. Keeping solar panels clear of snow buildup is therefore critical for ensuring they live up to their full generating potential year-round, especially during the cloudy winter months when solar resources are already limited.
With solar energy being an increasingly vital source of renewable power, keeping panels in tip-top shape through the cold months is a must. A little strategic tilting, preventative coatings, and periodic clearing go a long way in maximizing solar panel snow mitigation. And new advances like automated heaters make 24/7 winter exposure no match for harnessing those precious rays, even during the darkest days. Stay ahead of Old Man Winter by implementing these targeted snow removal techniques. Before long, you'll be reaping the benefits of solar energy year-round!
About United Better Homes
United Better Homes is an experienced company that employs GAF-certified roofers, master window installers, and solar specialists. We take our customer's homes and transform them into energy-efficient abodes that look incredible. To learn more or to schedule a FREE consultation, please don't hesitate to call us at 401-274-0111.
What do you do with solar panels when it snows?
When snow is forecast, it's important to take proactive steps to minimize buildup on solar panels. Gently sweeping off light snow before it freezes and using tools to safely clear heavy snow ensures solar panels can continue generating energy through winter storms.
Should I shovel snow off my solar panels?
Yes, it is recommended to shovel snow off solar panels to maintain their efficiency. Removing snow buildup helps allow sunlight to reach the panels, preventing significant energy production losses that can occur when snow covers the photovoltaic cells.
Can I put heat tape on solar panels?
Special solar panel heating systems and heat tape can be installed to automatically melt snow on panels. However, these heating methods divert some solar energy to run. Hence, the trade-off in energy efficiency needs to be evaluated based on local climate and average snowfall.
Do solar panels still work with snow on them?
Solar panels can still generate some electricity if they have light snow accumulation, but energy output will be reduced. Heavy snow or complete coverage of the panels will block sunlight and essentially halt energy production until the snow can be removed.
Roofing trends evolve with changing aesthetics, technological advancements, and sustainability needs. In 2024, there's a fresh assortment of roofing styles, ranging from new materials to innovative installation techniques.
The latest trends include eco-friendly roofs such as green and solar roofing, more durable roofing materials, "cool" roofs, advances in roofing technology, and unique patterns and colors.
Let's explore these incredible styles in detail and help you decide which options are best for your home.
One trend that has picked up substantial momentum over the last few years is eco-friendly roofing. A significant component of this trend is green roofs, which are partially or entirely covered with vegetation. Besides the aesthetic appeal, green roofs reduce the urban heat island effect, improve air quality, and provide a habitat for wildlife.
Just imagine having a green roof in a city setting and growing flowers and a vegetable garden on top of it. The flowers attract pollinators that the world needs to survive. Plus, you'll have fresh produce and not need to rely on the grocery store as much!
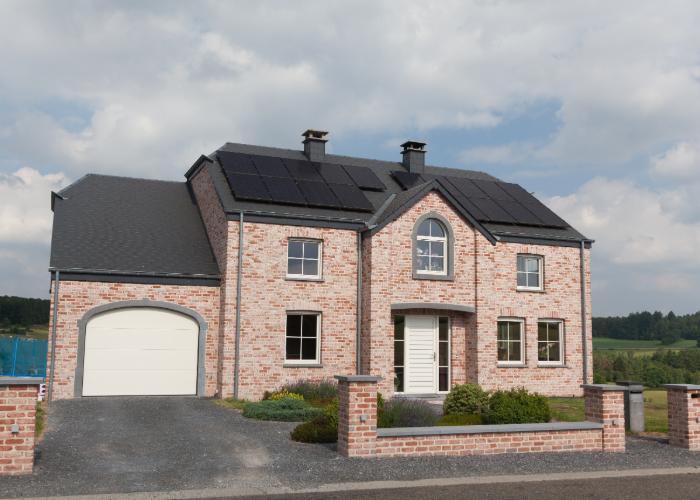
Solar roofs are another eco-friendly solution growing in popularity. Integrating solar cells directly into roofing materials has revolutionized the concept of solar energy. This emerging trend eliminates bulky solar panels and provides a sleek, attractive, and energy-efficient roof.
On a side note, do you know that adding a solar roofing system in Rhode Island comes with money-saving incentives? The federal and state governments have implemented programs that could get your solar roof for free! There are varying programs and tax rebates for residential, commercial, and industrial solar customers.
Metal roofing is becoming more popular due to its durability, weather resistance, and variety of aesthetic options. Modern metal roofs come in various styles, emulating materials like shingles, tiles, and slate. These roofing systems can last over 50 years with minimal maintenance, making them an excellent long-term investment.
Synthetic materials, designed to mimic traditional materials like slate, tile, or wood shake, are also gaining traction. These roofing materials are much lighter, easier to install, and require less maintenance than their natural counterparts. Moreover, many synthetic materials are fire-resistant and more durable, increasing their appeal.
That's OK! Synthetic materials can make it possible with the same curb appeal and durability as traditional slate.
With the increase in global temperatures, cool roofing is getting the attention it deserves. Cool roofs are designed to reflect more sunlight and absorb less heat than standard roofs. They come in various colors, materials, and types, making them a versatile choice for homeowners looking to reduce energy costs and mitigate the heat island effect.
In addition to the many innovative roofing trends that 2024 has to look forward to, there are just as many upcoming technologies. Roofing technology helps consumers get fitted with the perfect roof for their structure. Inspections are performed with more accuracy too! From roof design to repair, your roof will surely get the star treatment.
Drone technology has changed the roofing industry landscape, making inspections safer, quicker, and more accurate. Instead of risking injuries by climbing ladders and walking on roofs, contractors can now use drones to gather high-quality, detailed images of your roof.
There are several types of data that can be achieved through drone roof inspection:
Homeowners are increasingly turning to digital tools for pre-installation visualization. Software solutions offer 3D modeling that can accurately depict how different materials and colors will look on a specific home, enabling better decision-making before the construction phase.
GAF has a virtual roof design tool that allows customers to see their home or business property with varying roofing systems. Some consumers may think a green roof will look great until installed. The virtual roof design tool changes everything.
The year 2024 is seeing a shift from traditional neutral colors toward bold and vibrant colors. Homeowners opt for roofs in blues, reds, and greens to make their homes stand out.
In addition to color, unique roof designs are also in vogue. From different slope angles to unconventional shape configurations, homeowners are pushing the boundaries to give their homes a unique aesthetic appeal.
In conclusion, the roofing trends of 2024 are highly influenced by technological advancements, with a strong inclination towards eco-friendliness and a desire for personalized aesthetics. As homeowners become more conscious of environmental impacts and sustainability, we expect these trends to continue shaping the future of roofing.
Whatever the choice, one thing is clear: the roof is no longer merely a shelter but a crucial part of a home's overall design and functionality. With the variety of choices available today, homeowners can find a perfect roofing solution that fits their needs, preferences, and values.
Remember, a roof is a long-term investment. Stay informed about the latest trends and technologies and choose a roof that meets your needs and fits your local climate. The trends of 2024 are just the beginning.
About United Better Homes
United Better Homes is a licensed, GAF-certified business with extensive experience. The company offers residential and commercial roof repair, replacement, and new construction. Are you looking for solar roofing? They offer that too! Turn to a company you can trust by calling us at 401-274-0111. We'd like to give you a FREE quote!
One common question from homeowners is, how long does it take to replace a roof? It’s no wonder they might ask, as roof replacement is often expensive and inconvenient. However, a strong roof overhead is vital! Roofs protect a home against water damage while providing added insulation. A roof in good repair also keeps out pests and protects a structure against trapped humidity.
There is no “one size fits all” answer about roof replacement timelines. Obviously, your home’s size and a roofer’s availability affect this process. However, you might consider some details about replacement projects and how long they take on average. Then, you can discuss your home’s reroofing needs and your budget with a repair contractor near you.
Check out some factors that often affect how long it takes to replace a roof. This can help you better understand why your contractor might offer a specific timeline for your property's roof replacement!
A reputable roof repair contractor starts every job with a thorough property inspection. Note, that’s a property inspection, not just a roof inspection! Many contractors will ask to see inside the home so they can check for signs of water leaks.
Also, they might check the home’s gutters and the lawn next to the home. If they spot shingle granules or nails in those areas, these can signal needed fixes. In turn, that inspection might take several hours and not just a few minutes!
A roof repair contractor typically takes precise measurements of the roof before preparing a quote. The roof’s size determines how much material the contractor needs for replacement, so they can’t prepare a quote without measuring.
Also, a contractor might take into account dormers, slopes, and obstructions. Many contractors charge more for sloped roofs that require added fasteners. They might also increase their fees for having to work around unusual obstructions such as dormers, satellite dishes, and so on. Consequently, measuring a roof isn’t always a quick job!
Additionally, note that roofers often order materials new from a manufacturer, versus using materials in a warehouse. In many cases, materials degrade over time. In turn, shingles or tiles that have been sitting around for months aren’t typically as durable as new ones! Ordering new materials then ensures a reliable, durable roof overhead.
However, ordering new materials means that your roofer needs to schedule the installation accordingly. If those materials won’t arrive for a week or two, the roofer needs to wait that long before working.
While waiting for your materials to arrive, your roofer might suggest some prep work for your property. Preparation typically includes cleaning, to keep dirt and dust from getting inside the home during reroofing.
Also, a roofer might need to pull a permit for your roofing project. This step depends on local building codes and the project’s extent. For instance, a roofer might need a permit for a full tear-off or to install new roofing over existing materials. Those permits might also take some days to obtain.
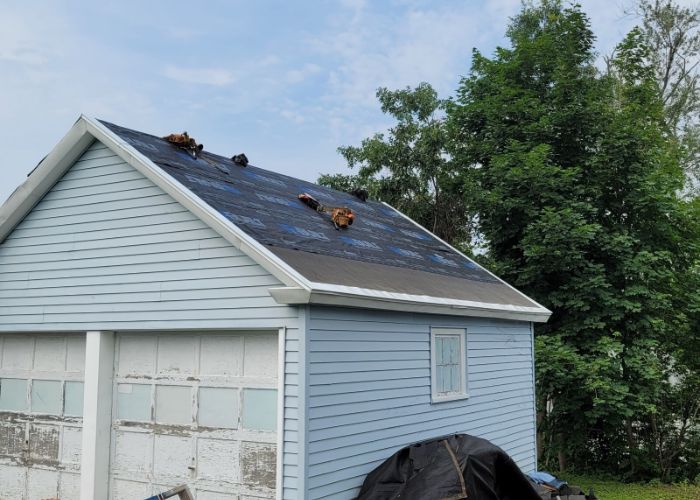
If a roofing contractor needs to remove existing materials, this usually takes 1-3 days. This timeline depends on your property’s size, the existing roofing materials, their crew size, and so on.
However, a roofer might not need to remove materials for every project. What determines if they can install new materials, like asphalt shingles, over existing shingles or tiles? First, local building codes allow only so many roofing layers on a home. Second, a roofer must determine if existing materials provide a solid foundation for new shingles or tiles.
Also, your roofer will consider the roofing material’s weight. For instance, they might not recommend adding layer after layer of heavy shingles. On the other hand, lightweight metal might not add undue stress to the home.
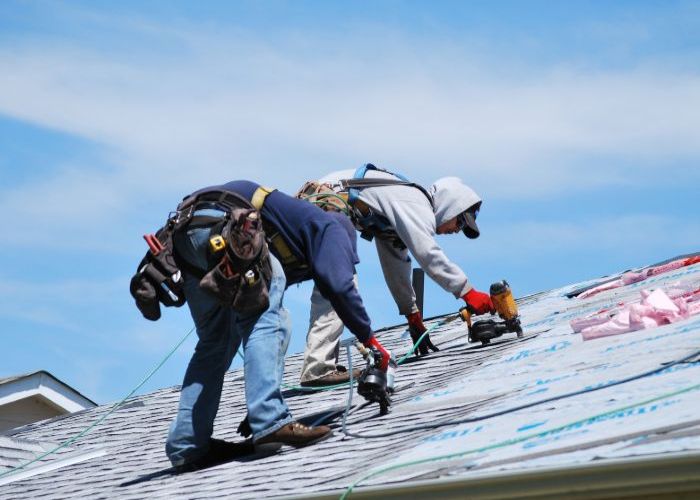
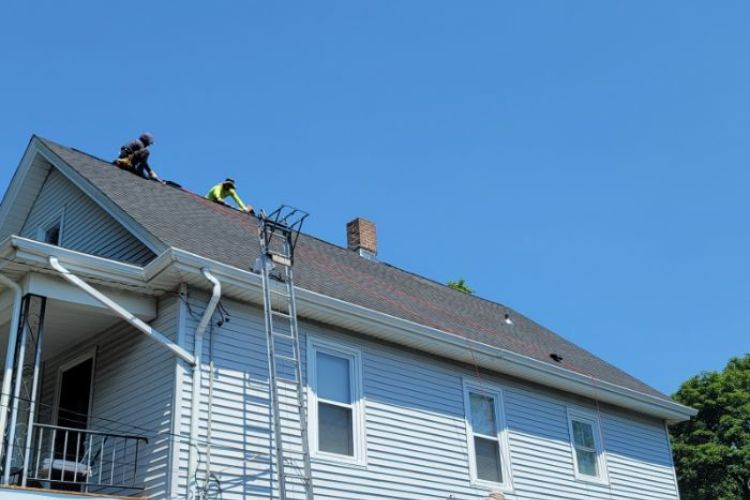
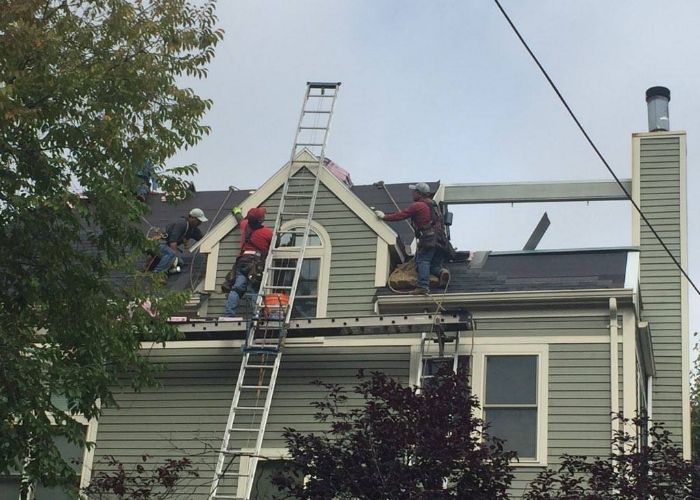
Once your materials arrive and the roof is prepped, it’s time for installation! If your roofing contractors need to remove existing materials, this can take a full day or longer. Your roofer first needs to pull up existing shingles or tiles, dislodging nails and other connectors.
Also, your roofing company might need to remove and replace the roof’s underlayment and decking. The underlayment sits underneath the shingles or tiles, providing insulation while repelling water. A roof’s decking attaches to rafters and joists, creating the roof’s foundation. Removing all these materials might take up to 3 days or longer.
Installing new decking and underlayment might require another 1-3 days. Once installed, the roofer and crew then install shingles or tiles and the roof’s flashing. Flashing refers to metal panels that sit between the edges of materials and various obstructions. This flashing creates a trench or channel that keeps water out of those nooks and crannies!
Additionally, your roofer might replace gaskets around roof vents. These gaskets also provide a watertight surface around those vents. Roofers might also replace the vents themselves and make repairs to cracked chimney stacks.
Dormers and other obstructions slow down your roofer’s progress, adding to your roof installation timeline! A roofer usually needs to cut and trim more roofing materials to work them around these obstructions. In turn, the more complicated a roof’s surface, the more work for a roofer and the longer your installation project takes.
After roof installation, your roofer might need to schedule a final inspection. In most cases, they will schedule this ahead of time, so they avoid delays. Most inspectors only need a few hours to perform their inspection and release the permit.
Also, a roofer and his or her crew should perform a thorough cleanup after roofing installation. Cleanup doesn’t necessarily mean raking a yard, but they should retrieve as much debris as possible. Nails and other items often lost during a roof installation risk injury to children and pets. They can also damage lawnmowers and other lawncare equipment!
Your roofing contractor should also have a dumpster rental company remove that debris. They are also responsible for a portable toilet rental and removal! In turn, your property should be neat and tidy once the roofers leave. The cleanup process shouldn’t take more than a full day to complete.
The above information covers some general factors when it comes to a roof installation timeline. However, there are many other details that can affect how quickly a roofer might finish the project! Check out a few of those here:
Weather conditions don’t need to be perfectly dry and sunny for a roof installation. However, heavy rain and high winds can make work difficult if not impossible.
Also, a roofer needs to consider the threat of lightning strikes when working on a roof! A roofer might also avoid working in extreme heat or high humidity, to ensure a crew’s health and safety.
Rarely can a roofer install a new roof without help! In turn, local labor markets affect a roofing timeline, as a worker shortage can put your project off for weeks. Your chosen contractor might simply need to wait until qualified workers finish other projects and become available.
On the other hand, an abundance of workers can shorten that timeline! Roofers know that the more projects they take on, the more money they make. Consequently, they might take advantage of worker availability and hire a larger crew. This might let them finish your roof installation more quickly than expected.
As said, a roofer usually orders needed materials new from a manufacturer. In turn, anything affecting that market can also affect your reroofing timeline. For example, labor shortages can mean delays with manufacturers. Transportation issues such as union strikes can also mean delays in receiving those materials.
Since so many factors can delay a roof installation, homeowners might wonder if they can speed up the process. First, never attempt any roof repairs yourself, as you risk doing more damage. Second, don’t even walk on a roof if you’ve never been on one before! Even experienced roofers can suffer falls and resultant injuries.
However, a homeowner might schedule needed power washing even before getting reroofing quotes. This ensures a company can complete the work as needed. Also, do some research on roofing materials beforehand. You can then quickly choose the right option for your home!
Lastly, choose a reputable roofing contractor for the job. A professional contractor knows when and how to obtain permits. In turn, you can avoid the risk of a stop work order from the city by using a pro. Professionals also ensure a quality job, so you know your new roof will last for years to come!
Our roofing company, United Better Homes, is happy to help answer your questions about roof replacement. Hopefully this information has helped! You can also visit our blog for more great tips and advice on roofing replacement for your property. Also, if you’re in the market for repairs or installation, call our roofing professionals. We service most areas in Massachusetts, Rhode Island, and Connecticut. For a free inspection and price estimate, contact our roofing team today!
Durable, high-quality roofing in Rhode Island is vital for every structure, as the state’s ever-changing and often inclement weather can wreak havoc on areas roofs. Unfortunately, many homeowners and commercial property owners know very little about the roof that’s over their heads, including how to maintain it and when it needs repairs.
To ensure your residential or commercial roof is always in good repair, check out these 10 pro tips you should know about roofing in Rhode Island.
If your roofing contractor recommends a roofing material that is more expensive than others, don’t assume he or she is just trying to “rip you off”. High-quality roofing, built with thick, durable materials will often cost more to install than other options, but will usually last longer and provide better insulation. Investing in those quality options means lower utility costs and less need for replacement over the years.
Tearing off and installing new roofing materials is not like putting up drywall or any other jobs easily managed by general contractors. Quality roof installation requires years of training and experience, and an amateur installation can result in roof leaks, shingles blowing off the roof, and other unexpected disasters.
Waiting until your home or commercial structure is missing large sections of shingles or tiles before scheduling reroofing might actually cost you more money in the long run. Worn-out and missing roofing materials risk roof leaks, which can then mean additional repairs inside and outside the home, and the potential for mold growth and other such damage. Schedule reroofing before the roof is excessively worn or damaged, to avoid these costs and ensure your structure is in good condition.
Regular roof inspections are an excellent investment for any property, and maintaining a structure’s roof with needed repairs means lower costs over the years. Ignoring missing shingles, broken tiles, torn flashing, and other damage risks holes in the roof and resultant water damage inside the home, as well as the need for an entirely new roof. Investing in repairs as needed will then keep your costs lower over the lifetime of property ownership.
When was the last time you had your structure’s roof cleaned? Storm debris, dust, soot, air pollution residues, and even bird droppings are often caustic and damaging, and work their way under tiles and shingles, loosening them and their connectors. To keep the roof in good condition, ensure you keep it clean throughout the year.
Tree branches tend to drop lots of damp leaves and twigs onto roofs below and become roosting places for birds who leave their droppings behind as well. To protect a roof from damaging debris, trim back those overhanging branches regularly.
Property owners might not associate clean gutters with a roof in good repair, but clogged gutters allow for standing rainwater; roof eaves, underlayment, and other materials than absorb that water, leading to premature damage. While gutter cleaning is probably not your favorite job, ensure it’s done as needed to protect your structure’s roof.
Roof vents allow humidity inside the home to escape and they also allow roof materials to breathe as well. Blocked or damaged vents mean trapped humidity along the roof line which can result in wood rot and other damage. Keep those vents in good order to avoid otherwise unnecessary repairs.
Adding new roofing over existing shingles or other materials means less cost and hassle, but even if local building codes allow for another roof layer, be wary of adding these to your structure’s roof. Too much weight on the roof can lead to premature damage, and worn or damaged shingles might not provide an adequate foundation for that new roof.
Because a structure’s roof is so vital for interior insulation, its condition can affect property values. An older, worn-out roof can easily lower the value of your home or commercial structure, while investing in a new roof, especially of durable, high-quality material, can increase those values. This is especially vital to remember if you might put your property on the market anytime in the future and are looking to get maximum profits from the sale.
United Better Homes is proud to offer this information about roofing in Rhode Island to our readers and we hope you found it helpful. If you’re in the market for roof repairs or a new roof installation, trust our experienced Rhode Island roofing contractors to get the job done right. We offer quality repairs at affordable prices, and outstanding customer service you won’t find elsewhere. To find out more, give us a call today.
When a homeowner needs a new roof, they often ask, “Can you build a roof over an existing roof?” Adding a new layer of shingles over the existing roof, called reroofing, saves on the cost, hassle, and mess of a tear-off, all of which are good reasons to consider this option, if possible!

If your home’s current roof is functional but needs more than a few repairs, you might be able to build a roof over the existing roof layers. You’ll need to note building codes, the condition of existing shingles and decking, and the home’s structural stability before deciding if reroofing is an option for you.
Since not all homes are good candidates for reroofing, it’s helpful for homeowners to note when you can choose reroofing versus a tear-off, and why your home might need an entirely new roof instead. Homeowners might also ask if they can increase the pitch of a roof or change its shape with reroofing or other such simple changes, for better drainage or an improved appearance.
To ensure you’re keeping your home in good repair and always looking its best, consider these simple tips about reroofing versus a new roof installation, and how to attach a new roof to an old roof. You can then discuss all your options with a roofing contractor near you, and make the best decision for your home.
A roofing contractor near you is the best source of information when it comes to your roof repair or re-roofing options and needs; however, you might note some details that they typically look for when it comes to your home’s roof and what might affect your choices for new roofing and repairs.
While there might be many reasons you cannot opt for reroofing and need a complete tear-off, note that adding a new roof layer over an old roof means less cost and hassle, as well as less mess and trash. Asphalt shingles are recyclable but this process often creates lots of fumes and emissions, if you can even find a company willing to recycle shingles! Opting for a reroofing where possible means keeping those shingles out of landfills, making it a very eco-friendly choice for homeowners.
While re-roofing or adding a new roof to an old roof is an excellent choice in many cases, there are times when this simply will not work for a home, and when a roof replacement is best. Roof decking damage should be addressed before new shingles are added, as one example, to prevent interior water leaks, structural damage, and mold growth.
Asphalt shingles typically last anywhere from 10 to 30 years, depending on their quality. Metal panels over asphalt might last some 50 years or more.
For the longest roof lifespan, leave this work to a pro! Professional installation helps ensure shingles stay in place even in high winds, increasing their lifespan. A high-quality installation is even more important when reroofing or adding a new roof over an old, to ensure those shingles are attached properly and the roof is in good condition before work begins.
While weather conditions also affect asphalt lifespan, so does the way you maintain your home’s roof over the years. Invest in regular roof washing, to remove damaging storm debris and drying soot, dust, air pollution, and other such residues. An annual inspection also allows you to make repairs as soon as needed, keeping damage to a minimum and ensuring your home’s roof is always in good repair.
Reroofing is a job best left to a qualified roofing contractor near you. Being on a roof or ladder is dangerous enough in any circumstance, but even more so when you’re using a nail gun, pry bar, and other such tools. If you are considering DIY roof repairs, however, note how to attach or layer on a new roof over an old roof.
Once you’ve finished reroofing, rake the roof again. This will ensure you collect any loose nails and connectors and that the roof is clean and free of debris.
While adding a new roofing layer over the existing roof might raise it a slight bit, the only way to change the shape of a roof is by replacing its interior and exterior structural materials. This includes the rafters and joists that create roof shape.
Changing out the walls, ridges, and rafters can change the roof shape and entire appearance of your home but this job is typically expensive and involved, and requires a permit. However, a more sloped or pitched roof can encourage added water runoff, protecting those roofing layers, and potentially increase your home’s value. Talk to a real estate agent or appraiser if you’re thinking of changing the roof shape to enhance property values.
If you are looking to change the shape of your home’s roof, you might familiarize yourself with their various shapes and types. You can then discuss your options with a home renovation contractor or roofer near you as needed.
If you’re not sure about the right roof style for your home or addition, tell your contractor what you want to accomplish with the roof; are you just looking to add a bit more visual interest to your home’s exterior? A gambrel or M-shaped roof might do the trick. Do you need more space and light in an upper room or attic? Add dormers or a gambrel roof. If you’re tired of fixing water and storm damage, it might be time for a hip roof on your home.
For added protection against the elements and a bit of shade over your home’s patio, consider adding some roof rafters extending from the house roof. First, calculate the sightline clearance height and then determine the beam size you’ll want to use. Choose your roof pitch and style; a shed roof, mentioned above, is probably the easiest to construct and offers lots of shade and water runoff protection.
Stain the wood pieces before installation, to protect them from outdoor elements and ensure an even covering. Fasten the post bases to the ground with what are called lag bolts; make sure they sit plumb and level. Cut the rafters so they sit flush on those post bases and cut an angle along the top of the post base to accommodate; ensure you install those beams on the posts and not to their sides, as bolts aren’t strong enough to support the weight of those rafters.
Cut the outer rafters so they sit flush on top of the house roof and attach them to the posts. Once all the rafters are in place, install horizontal planks to form the patio roof. If you’ll be adding shingles rather than opting for a pergola look, attach plywood decking over the rafters and then roof felt. You can then install roofing shingles.
This information is proudly presented to you by United Better Homes. If you’re still wondering, “Can you build a roof over an existing roof,” or know that your home is ready for roof repairs or full-scale roof installation, call the pros at United Better Homes today. We stand behind all our roof repairs and installation work with an industry-leading warranty and use only the highest-quality, name brand materials built to last! For all your re-roofing and installation needs, rely on the name you can trust, United Better Homes. Contact us today for roofing services in Rhode Island & Massachusetts!